Wednesday, October 25, 2017

Cheat Sheet Adobe Illustrator


Start New Illustrator Project
·         Choose File then New
·         Choose Print, choose your size and orientation


Save your work for the first time
·         Click File then Save
·         Ensure the Illustrator AI option is selected as the type of file before clicking save

Enable Smart guides
·         Select View and ensure Smart guides is ticked. This will help you to align the shapes you create

Rectangle Tool
·         Right clicking the rectangle tool allows you to choose different shapes
·         When selecting the polygon shape, you can use the diamond shaped widget on the edge to change the amount of sides
·         Use the outside square widgets to resize the shape and rotate it
·     Make sure you hold down shift when resizing to keep the proportions locked
·         Use the inside widget to round the corners if desired
·         Use Objects then Arrange to send the shapes forward or back
·         Select Object and then arrange to bring shapes forward and back
·         To curve only select corners of a shape select the area with the direct selection tool and drag the widget to curve those corners

Ellipse Tool

·         Hold down shift to make it a perfect circle
·         Select the center point of the circle and then alt to create a circle within a circle. If you don’t press alt it will just create the circle from the center

Line Tool
·         Used to create lines
·         Can edit the thickness and qualities of the line using the stroke editing tools on the top control panel
·         Use Stroke Panel on the right control panel and choose Show Options to experiment with arrow head options
Stroke and Fill
·         You can remove the fill to see through the shape
·         You can change the colour for both stroke and fill by selecting an object and choosing the colour on the top task bar
·         You can make the line thicker for stroke by clicking the drop down menu in the top task bar
·         Fill can be patterns, gradients or solid colour

Selection Tool (black arrow)
·         Enables you to pick up an object and move it around
·         Selection tool can also be used to resize the object
·         Drag your curser over multiple shapes to select them together

Direct Selection Tool (white arrow)
·         Enables you to manipulate a part of that object or shape
·         Drag your curser over the section of the shape you want to manipulate

Align Function
·         Use selection to select all the shapes you want to align
·         Use the align tool to align the way you want

Shape Builder Tool
·         Use the selection tool to select all the shapes
·         Select the shape builder tool
·         Drag from one shape to the other to join to shapes
·         To cut out a shape use the same shape builder tool but press alt at the same time

Image Trace
·         Select the Window menu in the control panel
·         Click on Image Trace
·         Choosing Low Fidelity Trace will trace the pixel image to make it into a vector image
·         You can experiment with all the different options such as grey scale, line art, 3 colours etc.
·         Selecting Silhouette then Expand will allow you to change the colour of the new formed vector shape

Use Image Trace to create a Pattern
·         Once you have your vector shape Press Object, Pattern and the Make
·         You can move, rotate, lower the opacity and change the colour of the shape and it will update the pattern
·         Select Done and it will be added to your swatches
·         You can then put the pattern onto a shape
Add another Artboard
·         Select Window then Artboard
·         You can also select how many artboards you want when you open a new file

Finalizing and Uploading your work to your blog
·         When you are finished and want to upload you work to your blog click File, Save and choose Adobe Illustrator Ai from the drop down menu. (Important: Always keep an illustrator file format saved in case we need it for later use.)
·         Then click File, Export and choose JPEG from the drop down menu. Click okay to the standard settings


Monday, October 9, 2017

Term 4 - For Sale - Commercial Photomedia

Lesson One -

1. Read through the assessment task notification. Note down any questions or concerns you may have.

2. Create a new blog post Unit 4: For Sale - Commercial Photomedia. Find images and information to answer the question 'what is a marketing campaign'?
Use the links in the Scope and Sequence to help answer the question.

3. Watch the 'Share a Coke' campaign video. Why do you think this campaign was so successful?
Find another marketing campaign for a product that you like and explain why you like this and why you think it is successful.


Lesson Two -

1. Access the History of a Logo Evolutions website (found in Scope and Sequence) and read the information.
Choose 6 of the companies in the list and answer the following on your blog -
A. Identify similarities between the gradual changes that take place within the logo development.
B. Suggest what makes a logo successful in the Twentieth Century.

2. Complete the Evolution of a Logo worksheet (found in Scope and Sequence)


Lesson Three -

1. Continue working on the History of a Logo/Evolution of a Logo worksheet from last lesson.
2. Make sure all work is completed from lesson one.
3. Consider the Medieval History behind symbols by researching Japanese symbols. Post images and your research to your blog.

Thursday, April 27, 2017

Lighting

Direction of light
Photography is all about light; how much, what colour and what direction. The direction of light can make a BIG difference to your image.

Top Lighting comes from above the subject, such as the midday sunlight. It will often cause flat images with little depth especially in scenic/landscape photographs. It will also present problems for portraits as having the sun pointing straight into someone's face will cause them to squint.

Side Lighting will emphasise texture by causing shadows across the subject. Side lighting is good for landscapes and architecture. However, using it for portraits will emphasise or exaggerate any skin flaws.

Back Lighting comes from directly behind the subject and will often cause silhouettes, which can be used to great effect by changing the subject into a two dimensional shape. The challenge for backlighting is getting correct exposure and often using the camera's spot meter (if it has one) to isolate the detail you want recorded.

Remember the Egg - Youtube tutorial

Monday, March 6, 2017

Frames and Conceptual Framework


Composition Rules - Guidelines to make your photos more compelling

Rule of Thirds
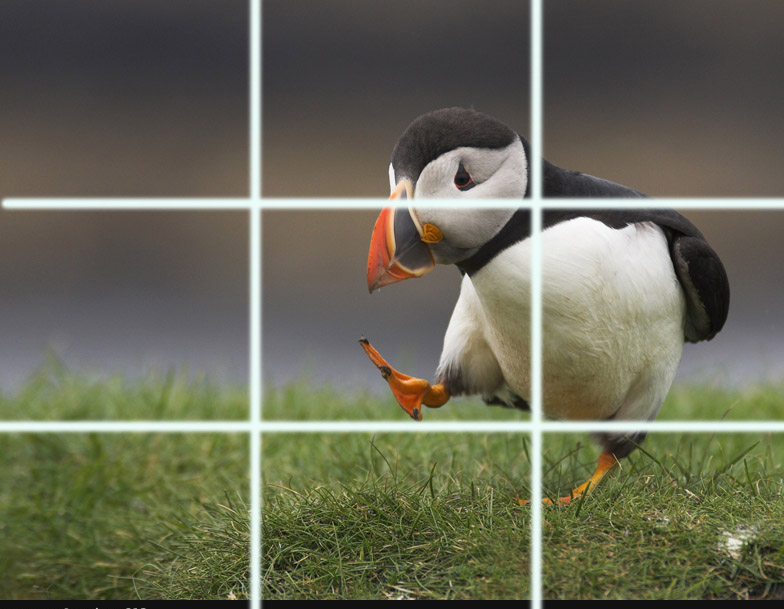
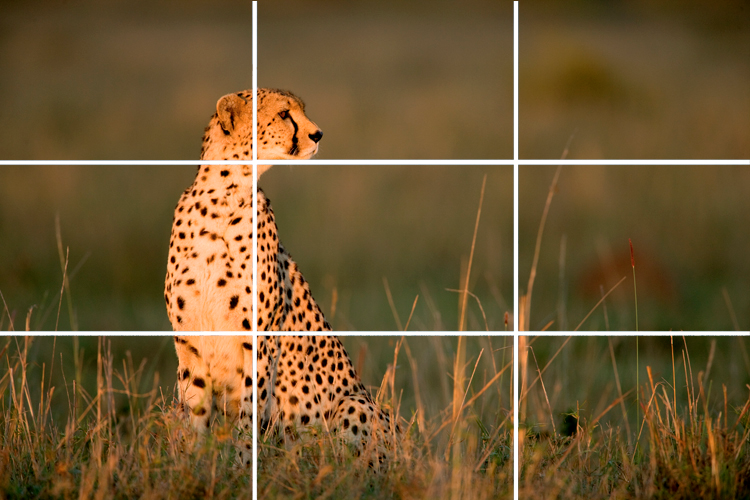
Imagine you have divided an image into 9 equal portions by a set of vertical and horizontal lines. The Rule of Thirds says you should position the most important elements of your scene along those line or points where they intersect. This will add balance and interest to your photos.
Diagonal Rule
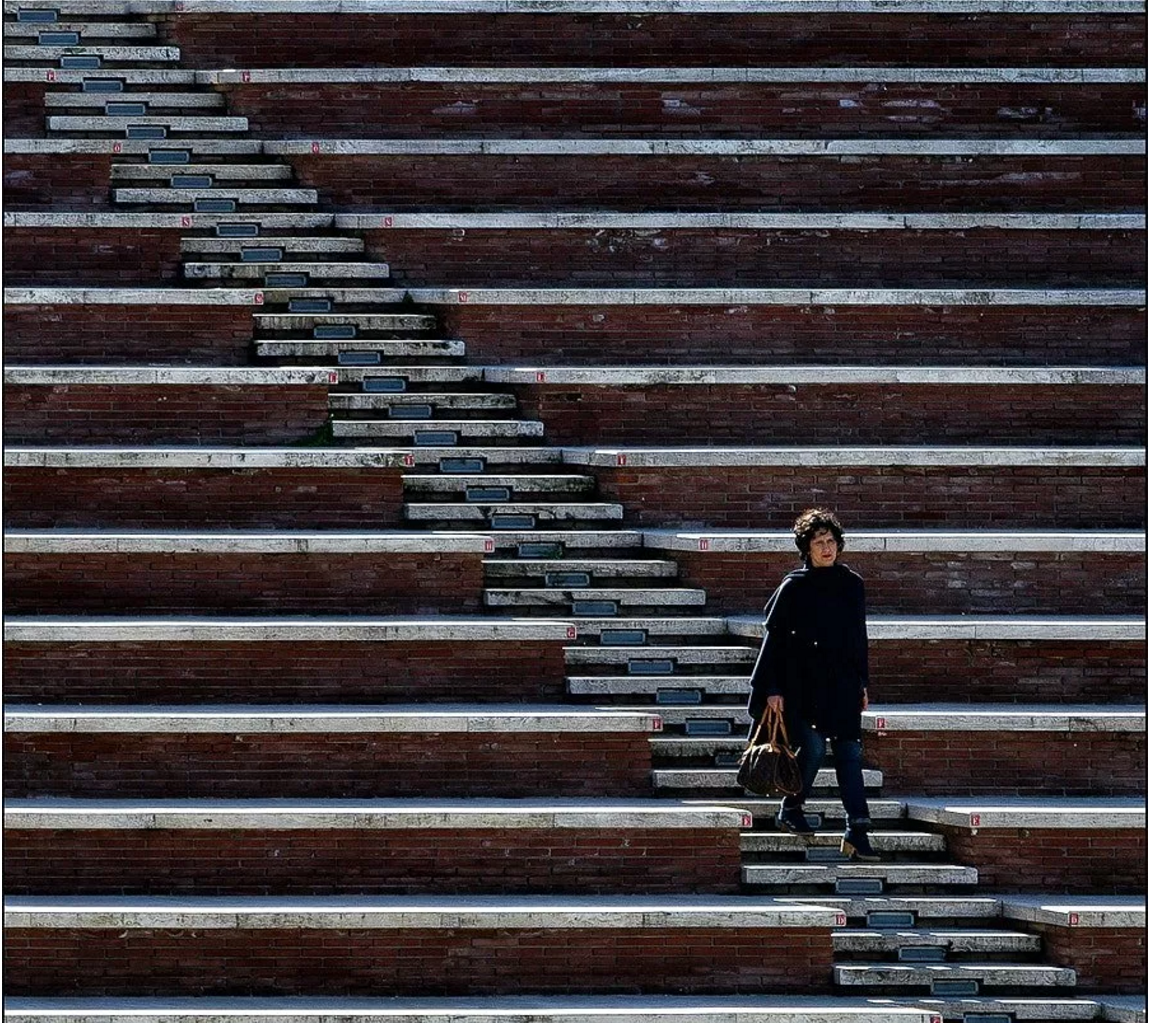
Diagonal lines work to draw the eye of an image’s viewer through a photograph. They create points of interest as they cross with other lines. They give an image depth through the suggestion of perspective. The diagonal line doesn’t actually have to be a line, nor does it have to be straight. It could be a river, the tops of a set of trees or an imaginary line connecting different objects in the photo.


Leading Lines
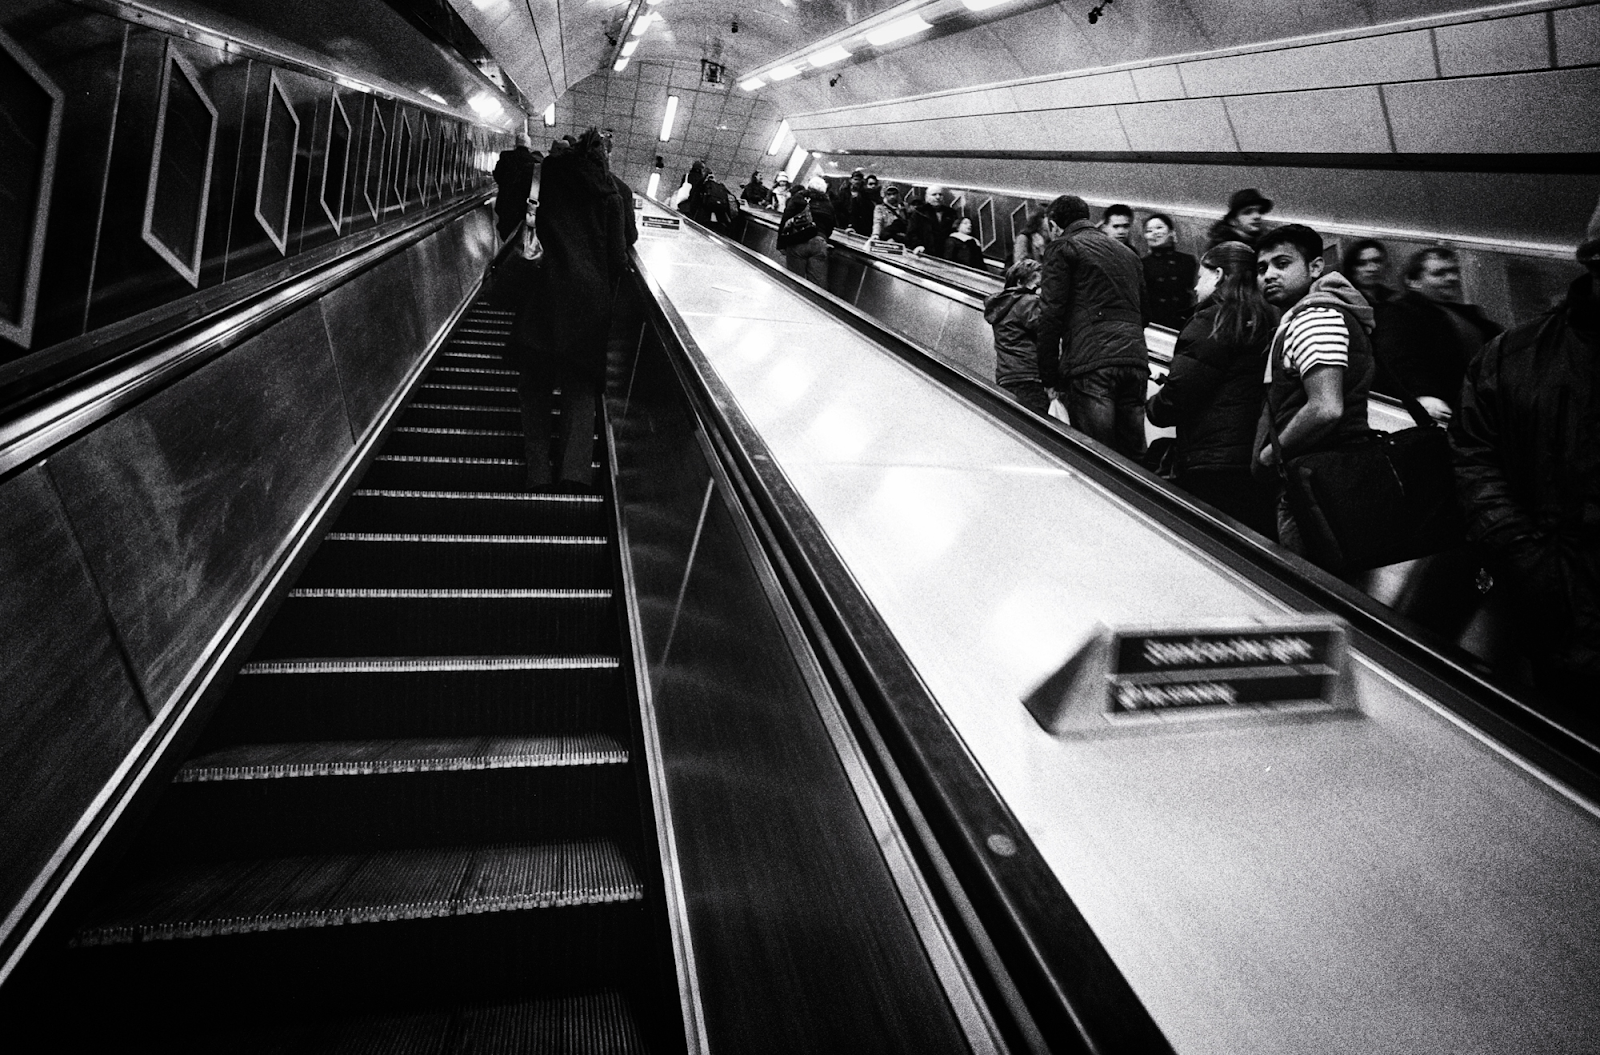
Leading lines refers to a technique where attention is drawn to the main subject through the use of lines. A leading line creates an easy path for the eye to follow, usually starting at the bottom of the frame and leading upwards and inwards. Roadways are the easiest way to use leading lines because they actually go somewhere and they give a feeling of motion. Often lines that reach a vanishing point are also good to use eg. a railway line, path or road.


Viewpoint Variations
One way to make your images stand out from others is to see it from another angle or viewpoint. When thinking about the subject in front of you and how you will capture it, move around a bit, up and down. Find an angle that no-one else sees or has thought of and start to create your own style. By exploring your subjects beyond predictable first impressions, you can create new and startling compositions. Look for unusual viewpoints and always fill the frame (make sure your subject is not too far away).
Balance (60 - 30 - 10)
Balance can be shown in many different ways. The 60 - 30 - 10 rule is a way to create a natural balance in an image. The composition must be divided into three parts, 60% is the main section of the image, 30% is half as much as the largest part and 10% is usually an object that takes up the least amount of space in the composition.
  

Tuesday, February 7, 2017

Aperture

The purple areas represent the largest angles at which light could enter the aperture.

When an object is in focus, light rays coming from that point converge at a point on the camera's sensor. If the light rays hit the sensor at slightly different locations, then this object is rendered out of focus.

The lens with the larger aperture has a smaller distance range over which objects reaching the sensor will remain in focus.

A large opening lets in more light to the sensor, but gives a narrower depth of field so less of the image is in focus.
A small opening lets in less light to the sensor, but gives a wider depth of field so more of the image is in focus.


An interesting website -
Aperture and Shutter: Science of the F-Stop
www.picturecorrect.com/tips/aperture-and-shutter-science-of-the-f-stop/

References -
http://www.cambridgeincolour.com/forums/thread1357.htm
http://bohorbfcaphoto.weebly.com/blog/the-examples-of-aperture-iso-and-shutter-speed
http://caseylorzphoto.com/how-to-use-dslr-camera-like-pro/aperture-cheat-sheet